Dec 14, 2020

10 Best Holiday Side Dishes Using A Convection Range

Menu planning for the holidays can be overwhelming.

With so many sides to choose from, it's challenging to narrow down your options.

If you can delegate anything, that will help take some of the responsibility off your shoulders. 

For everything else, it's best to have a balance of flavors, colors, and textures on the table, which will be equally as good on your plate. Try to do as much as you can ahead of time.

The less time you are in the kitchen the more time you'll have with your family and friends.

Below are the best side dishes for your holiday meal. These recipes are based on a range with a convection oven but you can use any oven or stovetop.

If you don't have convection modes available for your oven, these recipes are easy to follow without convection. You only need to adjust your timing.

10 Best Holiday Side Dishes Using A Convection Range

Let's start with some of the classics.

1. Green Bean Casserole


This casserole is a classic at my house. We've come a long way from making it with canned green beans and cream of mushroom soup when I was growing up.

The flavor and crunch of the fresh green beans, along with a homemade mushroom cream sauce and fried onion strings, will take this dish to the next level.

Here's my method: First, blanch or steam the green beans with salt to season them all the way through and then transfer them to a casserole dish.

Next, saute the mushrooms with some butter, olive oil, and fresh thyme. Deglaze the pan with white wine, then finish it with salt and pepper to taste.

Transfer the mushrooms to the casserole dish with the green beans.

In the same pan, the mushrooms were cooked in, start making the cream sauce by starting with a roux (butter and flour) followed by milk. Whisk all the ingredients until it's thickened, then season it to taste with salt, pepper, and a little nutmeg.

Pour the sauce on top of the mushrooms and green beans. This can be made ahead of time until this point.

The next step is to pop it into the oven for roughly 30 minutes at 375 F on convection roast mode. Just before serving, top with store-bought fried onions for an optimal crunch.

2. Mac and Cheese


This has recently become another family favorite for the holidays. Yes, it's an additional carb-loaded dish, but it's fun to indulge a little since it's the holidays.

There are a couple of ways to approach a good baked mac and cheese. My favorite go-to recipe is the "No-Boil" mac and cheese made in our combi-steam.

You cook it in your steam oven at 375 F on combi-steam mode for around 25 minutes, stirring once halfway through.

If you don't have a combi-steam oven, the traditional method also works.

Cook the macaroni according to package directions on your stovetop, drain and set aside.

Next, assemble a roux, then the bechamel finished with your favorite medley of cheese. At least four different cheeses are ideal. I recommend cheddar, Monterey jack, gruyere, and gouda.

Once your cheese sauce is complete, combine the macaroni with the cheese sauce and transfer to a baking dish.

Top it with bread crumbs, and place in the oven to bake for at least 30 minutes on convection bake 325

3. Stuffing


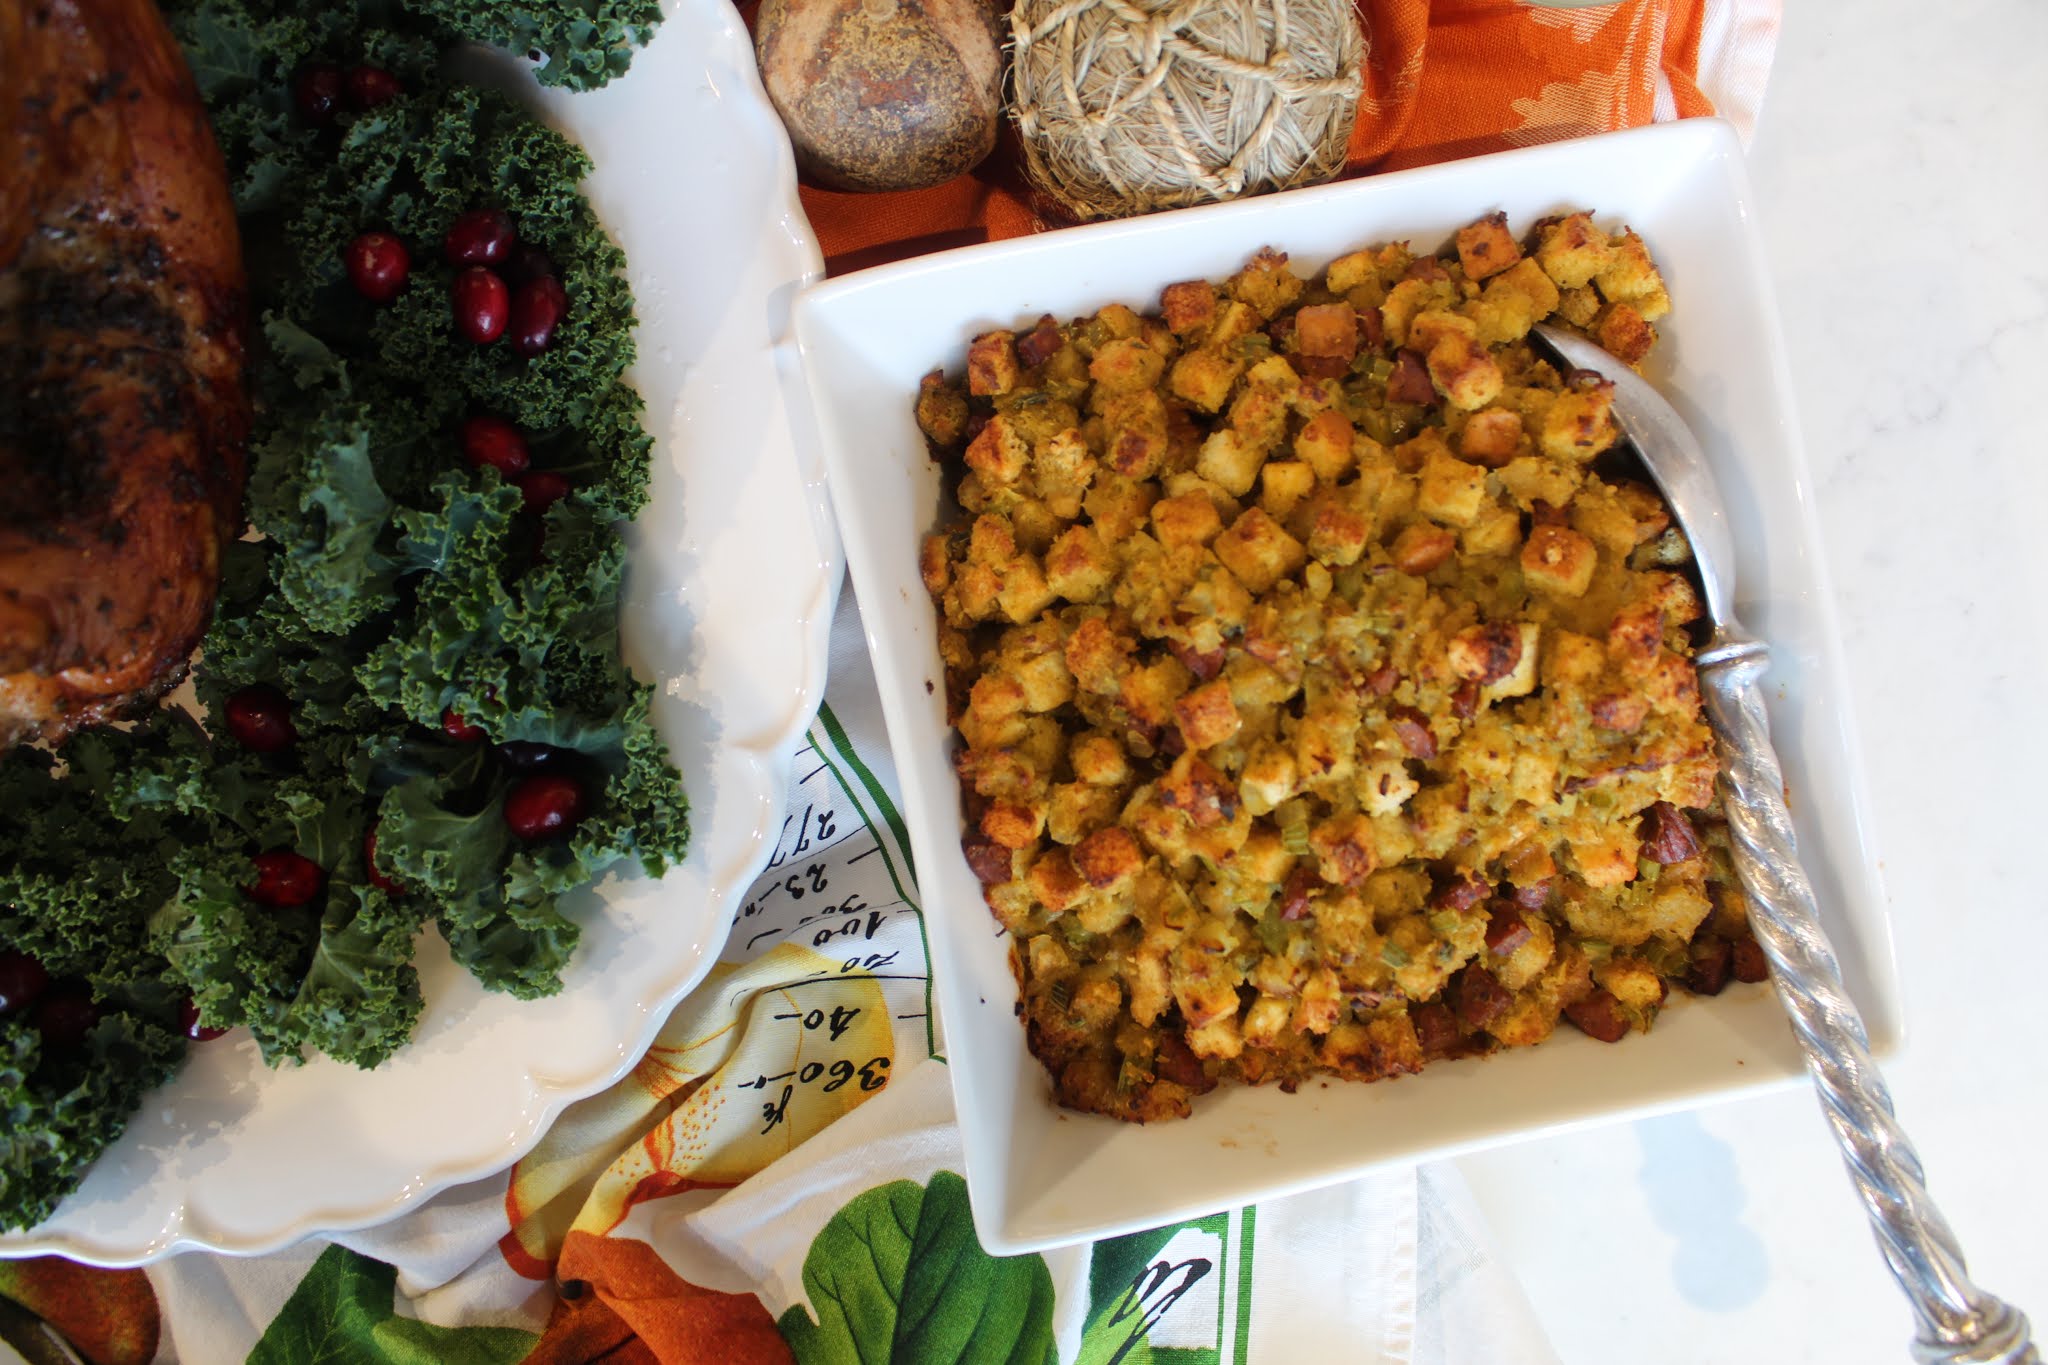
My favorite kind of stuffing is made with cornbread. There is a lot more depth of flavor, and the texture is superb. I also like additional texture in the cornbread, so something is breaking up the monotony.

Here's how to make the best stuffing: First, saute chicken andouille sausage (or your sausage of choice) in butter with celery, onions, herbs, and a little salt and pepper.

Once the vegetables have slightly softened, and the sausage has browned, add in the turkey stock and bring it to a boil. Then turn the heat off and mix in the cornbread croutons.

Once the cornbread has absorbed all the liquid, transfer everything to a greased baking dish. Bake it for roughly 30 minutes on convection roast mode at 375 F.

4. Maple Bacon Brussel Sprouts


This has to be my favorite preparation of this quintessential holiday vegetable.

Here's my method: Render sliced bacon on your stovetop at a low and slow temperature, then remove the bacon pieces with a slotted spoon and set aside.

Now combine two tablespoons of the bacon fat with 2-3 tablespoons of a good quality maple syrup and one tablespoon of olive oil, then toss the halved Brussel sprouts with this mixture along with some salt and pepper.

Roast in a preheated oven set at convection roast 375 F for around 30-40 minutes (depending on the Brussel sprouts' size), stirring about halfway through.

Remove from the oven, season to taste, then transfer to a serving bowl and top with the crispy bacon.

5. Mashed Potatoes


Mashed potatoes are a classic, and pair nicely with roasted meats. They are straightforward to make and relatively inexpensive.

After boiling your potatoes, mix in warmed milk and butter gradually until you have the perfect buttery and creamy consistency.

This process will prevent the potatoes from getting gummy and will help the flavors meld together more cohesively.

I recommend Russet potatoes for a classic mash. If you want to try something different, a nicely roasted Yukon gold potato will also work, or any roasted potato of your choice.

Pro Tip: The key to getting a creamy and smooth consistency for your mashed potatoes is to use a potato ricer or a food mill to process the potatoes after they've been boiled.

6. Sweet Potatoes


This recipe couldn't be easier, and it aligns with the rest of the menu in terms of roasting times and temperatures.

For this recipe, simply peel the sweet potatoes and then slice them thin with a mandolin. Toss them in a large bowl with a generous amount of butter, shallots, garlic, salt, pepper, and herbs.

Then, stack the slices vertically, packing them tightly into a baking dish, covering and placing them in the oven on convection roast mode at 375 F for about 45 minutes.

After 45 minutes, remove the foil, crank the heat to convection roast 425 F and continue roasting for another 10-15 minutes to brown the top.

7. Squash


Squash is one of the most versatile ingredients you can make for the holidays because it can be roasted, steamed, sauteed, or pureed. It could also be served as a soup if you are offering it as a first course.

My favorite preparation is to either roast or steams the squash, then pair it with cranberries, pecans, goat cheese, and fresh herbs.

It could also be served as a salad on top of mixed greens with a sweet and spicy vinaigrette or on its own, as pictured above.

I also made a honey glazed Delicata squash for additional color, texture, and flavor for the table. The preparation for this is effortless.
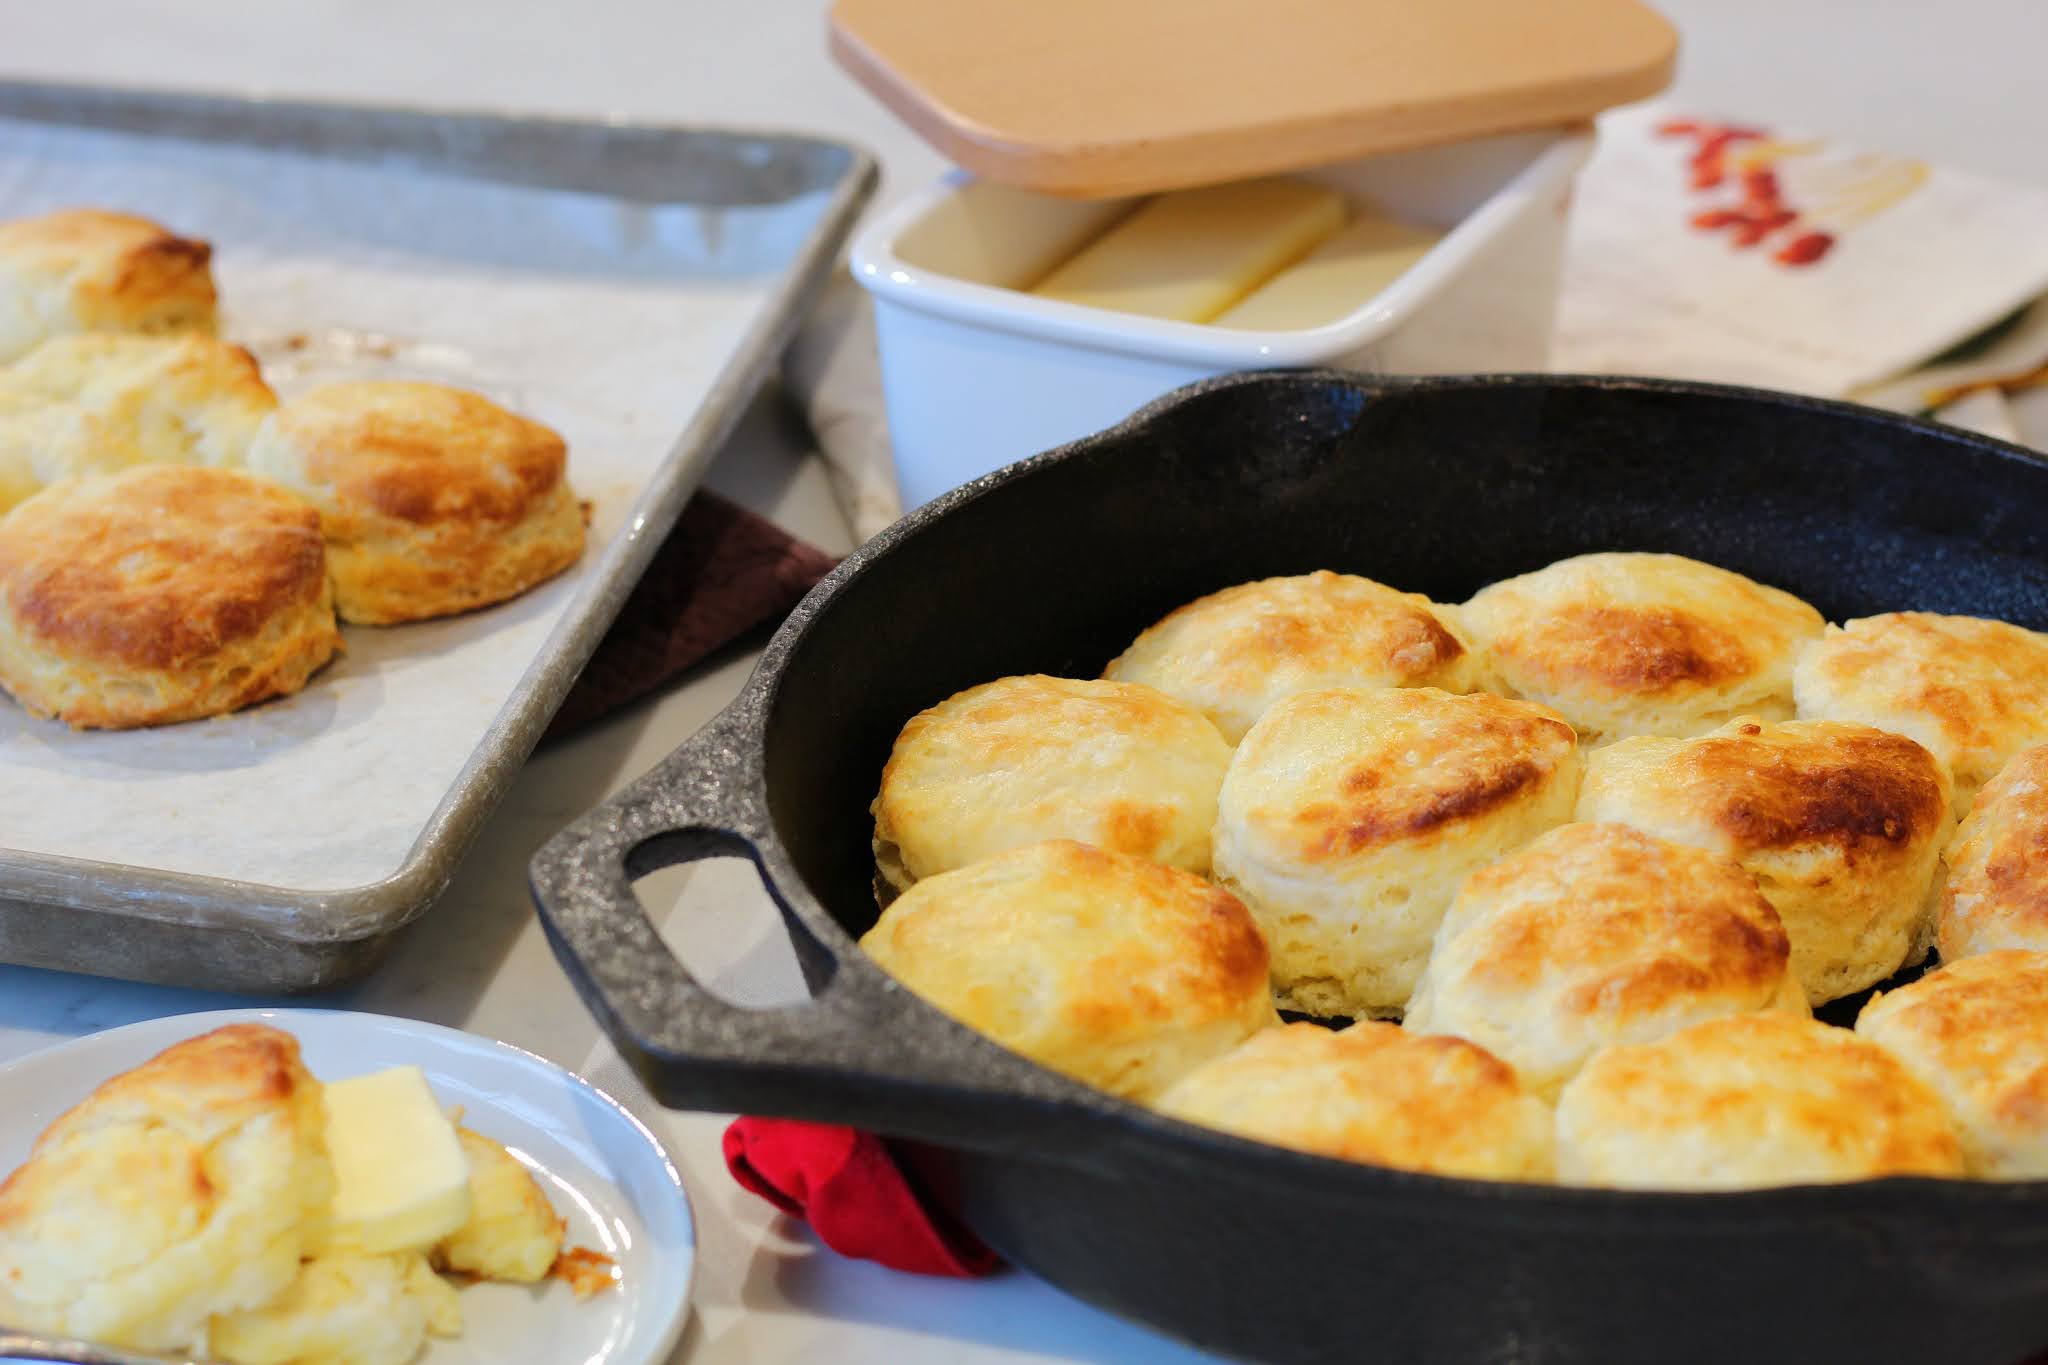

8. Bread Rolls


There are several ways to go when it comes to bread on the table with your meal.

A classic roll is a crowd-pleaser, but if you're looking to take things to the next level, you can't beat parker house rolls or buttermilk biscuits.

Parker House rolls can be prepared, assembled, proofed, refrigerated ahead of time, and then baked off before mealtime.

If you're going the biscuit route (pictured above), then measure and combine all the dry ingredients. Keep them refrigerated until you're ready to combine them with the wet ingredients.

When you're ready to bake the biscuits, combine your dry ingredients with your wet ingredients.

Then roll, cut, and place in either a cast iron pan (for more dramatic presentation) or a sheet tray and bake them on convection/convection bake at 325 F for about 20 minutes.

Alternatively, you could make a quick bread and cornbread or pumpkin loaf, slathered with some whipped honey butter.

9. Cranberry Sauce


This tangy and sweet sauce is an absolute must in your Thanksgiving spread! Whether you are making it from scratch or straight from the jar, this side should not be skipped.

Not only does it add beautiful color to your table, but the flavors are very refreshing when eaten along with the rich, creamy, buttery foods that dominate the table.

Making cranberry sauce from scratch couldn't be easier.

Just combine your fresh cranberries with water, sugar, seasoning, and some aromatics like cinnamon and citrus zest, then simmer on you're stove top until all the ingredients have melded and the sauce has thickened.

If you want to stick with a premade or store-bought sauce, Trader Joe's makes a lovely jarred cranberry sauce that will almost taste homemade, a big step up from the canned type.

10. Gravy


Nothing beats homemade gravy, and the best way to make sure you get it done on time is to roast off a separate batch of turkey wings apart from the bird that's roasting in the oven.

Also, take the turkey neck (and giblets if you like) to create a stock with water, herbs, bay leaf, and a mirepoix. Simmer for about 2 hours to develop the richest flavor, then strain and set aside.

After the wings are roasted, and the fat has rendered off, make the roux. Combine the roux with the strained turkey stock for a rich and flavorful gravy.

Pro Tip: Add the pan drippings from the turkey into your gravy for a little extra depth of flavor.

Key Takeaways

The holidays are all about the sides, so you always want to make sure you're offering a nice variety of classics and favorites.

Try to prepare as much as you can ahead of time and the rest will fall into place.

Mastering how to multi-rack cook in your convection oven might be tricky but many of the items listed above can cook together.

All you have to do is factor in the times and temperature, and you will have a seamless holiday meal.

Nov 16, 2020

How To Roast The Perfect Turkey

With holidays around the corner, many people start planning out their Thanksgiving meal. Along with planning comes a little bit of stress and fear about overcooking the turkey while making the sides on time.

I’ll address multi-rack cooking for the sides in a separate article, but for now, I’m going to explain how to roast the perfect bird.

It’s pretty straightforward culinary wise, but it does take some time to get right.

In this article, you will learn step-by-step how to achieve the perfect results for your turkey without the stress or hassle.

How To Roast The Perfect Turkey

Preparing Your Turkey

Let’s start with the prep. If you are lucky enough to get a fresh turkey, then less pre-planning is required.

However, most will be buying frozen turkeys, and if that’s the case, you need to thaw your turkey before you can begin prepping.

Also, make sure your turkey is not pre-seasoned, pre-salted, or self-basting.

Thawing will need to be done for a couple of days, depending on the bird’s size. The average defrosting time in your fridge is about 24 hours for every 5 pounds.

Alternatively, you can also thaw the turkey in a cold water bath, as long as the water is changed every 30 minutes to prevent bacteria from growing.

Lastly, if you have an extra-large capacity steam oven, you can use this to defrost your large turkey in a matter of a couple of hours. If you have a smaller bird, you can use a regular steam oven for defrosting as well.

Once your turkey is completely thawed out, give it a good rinse. Remove all the extras from the cavity like the giblets and neck, then pat it completely dry and prepare it for brining.

How To Brine Your Turkey

Traditionally, there are two ways to brine a turkey, the wet brine or dry brine. I prefer the dry brine, which is essentially pre-salting and seasoning your turkey, but it requires extra time to infuse the herb into the meat.

This is the process of osmosis, where the salt pulls the moisture out of the meat, and then, if it sits long enough, it gets reabsorbed back in, with all the beautiful flavor of the herbs and other aromatics/seasoning.

The longer it sits like this, the better.

The wet brine method uses the same science; however, it’s a lot more involved, requires more fridge space for storage, and gets very messy. Plus, the skin remains wet, which prevents it from getting that beautiful crispy brown color.

For the dry brine, I recommend at least one tablespoon of Kosher salt per every 5-6 lbs of meat, plus a medley of herbs such as sage, rosemary, thyme, and freshly ground pepper.


It’s very important to use Kosher salt over table salt.

Kosher salt is much coarser and can be absorbed slowly into the meat. Table salt is very fine and will end up getting absorbed too quickly. If table salt is all you have, then adjust your quantity accordingly. Think less is more.

You can also add some citrus zest into the brine for a little freshness or save it for the aromatics in the cavity.

Mix everything together and set it aside.

Next, separate the skin from the flesh in the turkey’s breast area and around the legs and thighs.

If you are having a hard time doing this by hand without breaking the skin, try using the handle of a wooden spoon.

Next, take the dry brine mixture and spread it evenly under the breast’s skin and the legs and thighs as best you can.

Afterwards, take the remaining brine mixture and spread it evenly over the rest of the turkey from the bottom to the top and all around.

Make sure to tuck the wings back behind the breast to keep everything neat and tidy.

Most importantly, you should keep your turkey on a rack to prevent the bottom from sitting in any juices or liquid as it brines.


Place the turkey in your fridge, uncovered for at least a day, or up to 3 days for maximum flavor.

Keeping the bird uncovered ensures a nice and crispy skin. This helps to dry it out gradually.

Before Placing Your Turkey In The Oven

On the day you will roast, remove the turkey from the fridge at least 1 hour before it’s going into the oven to take the chill off and get it close to room temperature.

You also want to make sure the oven racks are properly placed, remove the top 2 racks, and place the bottom rack into the lower third of the oven.

Now, preheat your oven to 500 F or 450 F convection roast.

Before you place your turkey in the oven, measure a piece of foil that will fit just over the turkey breast, spray with cooking spray or coat with oil, and set aside.


Meltdown one stick of butter, and fill the cavity with some aromatics. I used half a head of garlic, half an onion, half a lemon, and a whole medley of herbs like parsley, thyme, and rosemary.


Once the butter has melted, use a pastry brush and thoroughly coat the entire outside of the bird evenly.

If you have an oven with a built-in temperature probe, place your temperature probe into the thickest part of the meat in the breast area, then plug it into your oven and program the probe to 165 F.

Don’t forget to truss the turkey. Use kitchen twine, and tie the legs together.


Use a pan with a roasting rack or wire rack instead of a deep roasting pan. This will allow more air to circulate the turkey, cooking the bottom more evenly and quickly.

Now place your turkey in the oven at the high temperature (500 F/Convection Roast 450 F) setting for 30 minutes to “sear” the outside and lock in the juices.

After 30 minutes, drop the temperature to convection roast 325 F or 350 F, and place the foil tent on top of the breast.


Allow the turkey to finish roasting low and slow at this temperature for another couple of hours.

The approximate cook time is around 10-15 minutes for every pound of meat.

Key Takeaways


Roasting the perfect Thanksgiving turkey shouldn’t be stressful or difficult.

If you prepare ahead of time and follow the steps, it will come together very easily.

Sourcing a good locally raised turkey will also ensure you have the best flavor.

This usually has to be pre-ordered from a special farm or your CSA. Make sure you have plenty of herbs, salt, fresh ground pepper, and those aromatics!

Once the turkey is cooking in the oven, it’s time to focus on the rest of the meal!

Frequently Asked Questions:

1. Is it better to roast a turkey covered or uncovered?

The first 30 minutes at 500 F/convection roast 450 F should be uncovered, then drop the temp to 350 F/convection roast 325 F with the breast only covered

2. How do I keep my turkey moist?

The brining will help keep your turkey moist. Also, searing it at the beginning will help lock all the moisture in.

3. How do you cook a turkey without drying it out?

Brining is the best method, also using a probe will ensure that your turkey cooks to temperature instead of having it overcook and dry out.

4. Should I roast my turkey at 325 or 350?

Start at 500 F/convection roast 450F, then drop to 350 F/convection roast 325 F

5. How long do I cook a turkey per pound?

Approximately 10-15 minutes per pound, if the turkey has been brined, it cooks a little faster. I always recommend using a probe.

6. Should I put butter or oil on my turkey?

I prefer butter for flavor, but if you need it to be dairy-free, go with a neutral oil like canola or vegetable.

7. Why is my turkey always dry?

It’s very lean meat, with little fat. If it’s overcooked, it will dry out very easily.

8. Should I put water in the bottom of my turkey roasting pan?

No, this will create steam and will prevent it from getting crispy skin.

Nov 4, 2020


Grilled Fish Tacos topped with a Charred Corn and Red Pepper Salsa


1 lb cod fillet
1 tsp onion powder
1 tsp garlic powder
1 tsp cumin powder
1/2 tsp cayenne
1 tsp kosher salt
1 tbl olive oil
canola oil for pan
Charred corn and Red Pepper Salsa
1 tbl canola or vegetable oil
1 cup frozen or fresh corn kernels
1 whole red pepper, minced small
1 jalapeno, minced small
1 shallot, minced
juice of half of lime 
1 tbl minced cilantro

Garnish
minced Cilantro
lime wedges
sliced avocado
Corn tortillas

Directions:

Slice the cod fillet into small 2 inch pieces, coat with olive oil, spices, salt and pepper.  Allow the flavors to marinate in the fridge for around 20 minutes, but not much longer than that.
While the fish marinates, assemble to corn and pepper salsa.  Heat a medium cast iron or heavy skillet to medium high temperature.  Place canola or vegetable oil in the pan, once it shimmers, add the corn, and allow it to char in the pan for 5-8 minutes.  Now add in the shallots, red pepper, jalapeno, and sautee for a couple of minutes.  Once the vegetable have softened slightly, remove the pan from the heat, add the lime juice, cilantro, salt, and pepper.  Set aside.

Pre heat a grill pan, and coat lightly with canola or vegetable oil.  Grill the fisj fillets, use a fish spatula to flip them, they will be delicate and trick to flip otherwise.  While the fish is grilling, heat up the tortillas on the open gas burner or in the cast iron pan.
Now assemble, in the tortillas, place a couple pieces of fish, charred corn and red pepper salsa, sliced avocado, cilantro, and a squeeze of lime.  Enjoy!


Jan 8, 2018

Festive Flatbread


Festive Flatbread


Large store bought flatbread base or Naan
1 cup lightly packed baby kale/baby spinach
1 cup roasted butternut squash cubes
1 cup shredded Fontina
1/3 cup shredded brussel sprouts
2 tbl Pancetta, crisped
Sliced red onion (optional)
2 tbl pomegranate seeds
1-2 tbl olive oil
1-2 tbl grated Parmesan
Drizzle of pomegranate molasses


Preheat your oven on the “Stone” setting or Bake at 450 F with a pizza stone or inverted sheet tray on the bottom rack for at least 30 minutes.

Set your flatbread base on your pizza peel.  In a small bowl toss the greens and Brussel sprouts with a light drizzle of olive oil, salt and pepper.  Spread evenly on the flatbread.  Next sprinkle the Fontina cheese all over.  Now dot the butternut squash all around, followed by the rest of the ingredients, with the exception of the pomegranates and pomegranate molasses. 


Transfer to the oven by sliding the flatbread off the pizza peal and onto the hot pizza stone/inverted sheet tray.  Cook the flatbread for 8 minutes until the cheese melts and the crust is nice and crispy all around.  Use the pizza peel to remove the flatbread from the oven.  Sprinkle with pomegranate seeds and drizzle with pomegranate molasses, cut and serve!

Lime Custard Tartlets

Lime Custard Tartlets


           Tartlets
          
           1 can sweetened condensed milk (14 oz)
           1/2 cup fresh lime juice, plus zest from two limes
           2 Tbsp. powdered sugar
           4 egg yolks
  1 tsp vanilla bean paste
          2-3 packages frozen store bought mini phyllo tart shells          


         Whipped Cream
         2 cups cold heavy cream
         1 tsp vanilla bean paste
         2 tbl powdered sugar 
          
            
           Candied Lime (optional)
            
           1-2 limes, sliced into thin rounds
           1 cup sugar
           1 cup water
           ¼ cup granulated sugar

Preheat oven to convection 350 F degrees.
For Garnish (can be made ahead of time):
Combine water & 1 cup sugar in a small pan. Bring to a simmer & add lime slices. Simmer for 20 min.
Drain & spread out on a rack to dry for at least 1 hour
Put ¼ cup sugar in shallow bowl or tray. Once the limes are dry, coat both sides of the lime slices with the granulated sugar and place back on the rack. Cut the rounds into desired size for garnish (I usually quarter them)
For whipped cream
Chill the bowl and whisk attachment of your stand mixer.  Once chilled transfer the cold heavy cream, sugar, and vanilla bean paste into the bowl and whisk on high speed until soft peaks form. Transfer to a piping bag with star tip, and chill
For tartlets:
In a large bowl, whisk egg yolks with sweetened condensed milk, lime juice, sugar, vanilla bean paste and lime zest until smooth and blended.
Scoop the batter generously into the mini phyllo tarts. Bake for about 12 minutes, or until custard has set. Remove and let cool to room temperature.
Lastly top with whipped cream and candied lime quarters. Enjoy!